
NVBLOX includes 3 different applications for scene reconstruction. For detailed information please refer to the Nvidia’s website: https://nvidia-isaacros.github.io/concepts/scene_reconstruction/nvblox/technical_details.html
The following graph illustrates the method for building the NVBLOX samples.
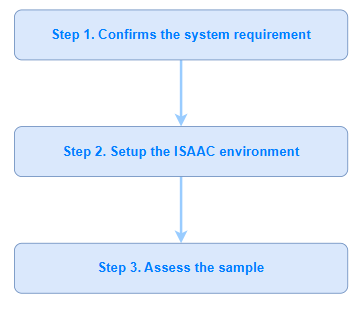
Confirms the system requirement #
Please ensure your system is qualified to Nvidia’s recommendation.
- Refer to NVIDIA ISAAC ROS Document: System Requirement
- Supported ROS version: ROS Humble
Setup the ISAAC environment #
For LIPSAMR Perception Development Kit users, skip to Step. 6 directly.
1. Follow the NVIDIA tutorial to set up for computation.
2. Follow the NVIDIA tutorial to set up for development.
3. Download assets for NVBLOX:
- Refer to the Quickstart Assets.
- Make sure all the prerequisites are installed.
sudo apt-get install -y curl tar- Run the following commands to download the assets.
NGC_ORG="nvidia"
NGC_TEAM="isaac"
PACKAGE_NAME="isaac_ros_nvblox"
NGC_RESOURCE="isaac_ros_nvblox_assets"
NGC_FILENAME="quickstart.tar.gz"
MAJOR_VERSION=3
MINOR_VERSION=2
VERSION_REQ_URL="https://catalog.ngc.nvidia.com/api/resources/versions
?orgName=$NGC_ORG&teamName=$NGC_TEAM&name=$NGC_RESOUR
CE&isPublic=true&pageNumber=0&pageSize=100&sortOrder=CREATED_D
ATE_DESC"
AVAILABLE_VERSIONS=$(curl -s \
 -H "Accept: application/json" "$VERSION_REQ_URL")
LATEST_VERSION_ID=$(echo $AVAILABLE_VERSIONS | jq -r "
 .recipeVersions[]
 | .versionId as \$v
 | \$v | select(test(\"^\\\\d+\\\\.\\\\d+\\\\.\\\\d+$\"))
 | split(\".\") | {major: .[0]|tonumber, minor: .[1]|tonumber,
patch: .[2]|tonumber}
 | select(.major == $MAJOR_VERSION and .minor <= $MINOR_VERSION)
 | \$v
 " | sort -V | tail -n 1
)
if [ -z "$LATEST_VERSION_ID" ]; then
 echo "No corresponding version found for Isaac ROS
$MAJOR_VERSION.$MINOR_VERSION"
 echo "Found versions:"
 echo $AVAILABLE_VERSIONS | jq -r '.recipeVersions[].versionId'
else
 mkdir -p ${ISAAC_ROS_WS}/isaac_ros_assets && \

FILE_REQ_URL="https://api.ngc.nvidia.com/v2/resources/$NGC_ORG/$NGC
_TEAM/$NGC_RESOURCE/\
versions/$LATEST_VERSION_ID/files/$NGC_FILENAME" && \
 curl -LO --request GET "${FILE_REQ_URL}" && \
 tar -xf ${NGC_FILENAME} -C ${ISAAC_ROS_WS}/isaac_ros_assets && \
 rm ${NGC_FILENAME}
fi
4. Clone the following repositories:
- realsense-ros
- isaac_ros_common
- isaac_ros_nvblox
cd ${ISAAC_ROS_WS}/src
git clone https://github.com/lips-hci/realsense-ros.git -b 4.51.1-lipsedge
git clone -b release-3.2 https://github.com/NVIDIA-ISAACROS/isaac_ros_common.git isaac_ros_common
git clone --recursive -b release-3.2 https://github.com/NVIDIA-ISAACROS/isaac_ros_nvblox.git isaac_ros_nvblox
5. Manually stop Git from tracking the COLCON_IGNORE file in the realsense_splitter package and remove the file. (Reference)
6. Launch the Docker container.
cd ${ISAAC_ROS_WS} && ./src/isaac_ros_common/scripts/run_dev.sh7. Use rosdep to install the package’s dependencies.
sudo apt update
rosdep update
rosdep install -i -r --from-paths /workspaces/isaac_rosdev/src/isaac_ros_nvblox/ --rosdistro humble -yNotes: Make sure the above command line should be keyed in the same row in the terminal as below
rosdep install -i -r --from-paths /workspaces/isaac_ros-dev/src/isaac_ros_nvblox/ --rosdistro humble -y8. Install the LIPSedge™ SDK from LIPS Corp.’s website and place the SDK file to /workspaces/isaac_ros-dev
cd /workspaces/isaac_ros-dev
sudo dpkg -i librealsense2z-lipsedge_2.43.0-bionic~20240903.02986cce_arm64.deb
9. Build and source the ROS workspace.
cd /workspaces/isaac_ros-dev
colcon build --symlink-install --packages-up-to isaac_ros_nvblox
colcon build --symlink-install --packages-up-to-regex realsense*
source install/setup.bash
10. Download and install the PeopleSemNet model assets:
sudo apt-get update
sudo apt-get install -y ros-humble-isaac-ros-peoplesemseg-modelsinstall &&
ros2 run isaac_ros_peoplesemseg_models_install
install_peoplesemsegnet_vanilla.sh --eula &&
ros2 run isaac_ros_peoplesemseg_models_install
install_peoplesemsegnet_shuffleseg.sh --eula
11. For multiple camera setup:
- Access the settings file with the command:
sudo vim /usr/local/bin/network.json- Press i
- Count: The quantity of the camera. LIPS Corp. uses 4 as an example for 4 cameras.
- IP: The corresponding IP address for each camera
- Press ESC to modify the camera settings.
- For saving the modified settings:
:wq12. Turn on the cameras and confirm the serial number for each camera:
- Make sure the camera serial numbers match the corresponding cameras.
ros2 launch nvblox_examples_bringup realsense.launch.py \
run_standalone:=True \
camera_serial_numbers:='211523062311,151223061441,1514222510
43,215122256933' \
container_name:='nvblox_container' \
num_cameras:=4
Assess the samples
- Refer to the ISAAC ROS: Examples for Intel® RealSense™
- Start a new Terminal to execute the samples below:
docker exec -it --user admin isaac_ros_dev-aarch64-container
bash
source install/setup.bash- NVBLOX reconstruction example with LIPSedge™ (Static)
ros2 launch nvblox_examples_bringup realsense_example.launch.py \
num_cameras:=4 \
mode:=static attach_to_container:=True \
container_name:='nvblox_container' \
run_realsense:=False- NVBLOX reconstruction example with LIPSedge™
ros2 launch nvblox_examples_bringup realsense_example.launch.py \
mode:=dynamic \
num_cameras:=4 \
attach_to_container:=True \
container_name:='nvblox_container' \
run_realsense:=False- NVBLOX reconstruction example with LIPSedge™ (Full-segmentation models)
ros2 launch nvblox_examples_bringup realsense_example.launch.py \
mode:=people_segmentation \
num_cameras:=4 \
attach_to_container:=True \
container_name:='nvblox_container' \
run_realsense:=False- NVBLOX reconstruction example with LIPSedge™ (Light-segmentation models)
ros2 launch nvblox_examples_bringup realsense_example.launch.py \
mode:=people_segmentation \
people_segmentation:=peoplesemsegnet_shuffleseg \
num_cameras:=4 \
attach_to_container:=True \
container_name:='nvblox_container' \
run_realsense:=False